Ninja blenders are exceptionally versatile. To get the most out of it, you must know how to use a ninja blender properly.
Ninja blenders have got some extra features that make them a tiny bit difficult for first-time users.
To use a ninja blender to its full potential demands a little understating of its predefined blending settings, programmed functions (Ninja blender Auto-IQ) and knowledge of how to use the ninja blender’s attachments.
Here, we have provided a few general tips to use a ninja blender. Let’s start with things you should do before using the ninja blender for the first time.
How to use a ninja blender? Checklist before 1st use
There are many variants in the Ninja blenders family,
- The regular countertop Ninja blenders with stacked blade assembly
- The single-serve Nutri ninja personal blender and Auto-IQ variants
- The Ninja Foodi and Ninja kitchen system blender/food processor combo
- The Ninja Foodi Cold & Hot blender
All these blenders have multiple features and can be used differently. To use a specific model of the Ninja blender you need to read the user manual that comes with the blender package.
I cannot stress this more! Before using a blender or any other appliance, please go through the user guide at least once. A quick look is enough to get an idea of the dos and don’ts.
Before using a Ninja blender for the first time, follow these steps to ensure the fitness of the appliance.
- Make sure the package is ok from the outside.
- Unbox and check the blender jar (There were a few complaints of cracked containers in the past.)
- Make sure the blade assembly, lid, motor base, and power cord are not physically damaged
The above tips are common for all blenders of the Ninja family.
After you open up all the accessories and attachments, the next step is to assemble the parts to start blending.
Fixing the pitcher on the base
The Ninja blender pitchers are usually square-shaped. You cant place the container on the base in any direction. There are locks (🔓︎) symbols with lines on top of the blender base, where you need to fix the jar.
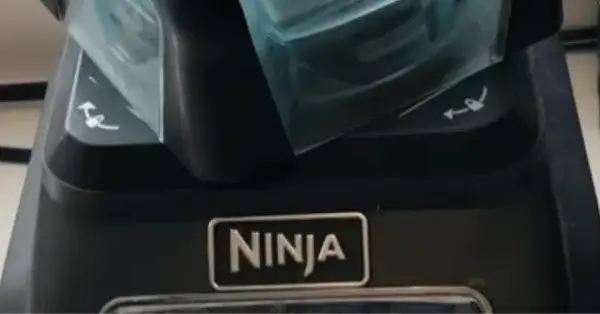
Place the jar at an angle on the base so that you can see these lock symbols. Rotate clockwise until you hear a click. It will lock the container in a working position on the motor base.
At the bottom of the base are sucker pods to keep the blender base stable during jar assembly and use. So don’t worry about pushing the container and locking it properly.
The single-serve models of the ninja blender family, such as Nutri Ninja Pro, have similar settings to place the cups on the jar like any bullet blender.
Invert the cup fixed with pro extractor blades over the base. The tabs on the blending cups should align with the slots on the blender base. These tabs will then push the actuators to start the motor.
Assembling Ninja blenders with stacked blades
After fixing the container on the base. Now is the time to assemble the blades and the lid on the jar.
Skip this part if you have a model without the stacked blade assembly.
The only countertop blender by ninja without a stacked blade is the Ninja chef. Ninja personal blenders also don’t have a stacked blade assembly. The Nutri Ninja cup also has the pro extractor blade fixed at the bottom.
Ninja Mega Kitchen System and Ninja Professional Blender are countertop blenders fitted with Stacked blades.
The assembly of blades and lid of these models must be the right way to make them work without issues.
The blade shaft will fit over the gear at the center of the container in an upright position.

After the blades, you need to put the ingredients for the smoothie recipe, soup, nut butter, etc.
The blades won’t turn without placing the lid on top. You need to align the arrows on the lid hold and jar handle.
With proper assembly, the red light on the base will stop blinking.
After the blades are lid is perfectly set up. You can turn on the Ninja blender with either pulse mode or Auto-IQ presets.
The food processor container also has a locking lid. It also locks on the handle of the food processor jar and has a release button to unlock it.
Putting ingredients setting speed and blending mode
For personal blenders, the company recommends putting the ingredients in the blender cups in the following order:
- Greens, veggies, and fruit
- Dry ingredients, nuts, and seeds
- Frozen fruit or ice
The Ninja Nutri Pro and Ninja Personal blender have no buttons. To start blending, you need to push the cups down on the base and hold them to keep the blades turning.
The Nutri Ninja with Auto-IQ base has a start/stop and a pulse button. There are two automatic programs to choose from to blend smoothies or hard ingredients such as ice.
When operated with preset buttons the blender will keep changing the blending speed accordingly during the countdown time.
In blenders with stacked blade assembly, you need to fix the dedicated blade and then put the ingredients in any order.
For countertop models, either set the blend mode manually or choose from preset modes like chop, crush, or dough. You can set the manual speed to low, medium, high, or pulse mode.
After choosing the settings, start blending until you get a nice and consistent mixture.
How to turn on a ninja blender?
If you do not set up the Ninja blender the right way, it won’t turn on. If there are issues with the ninja blender assembling the blades won’t move.
how to Turn on Ninja Blender: Tips
- Read the manual of your ninja blender model to assemble it correctly
- Use a working plug on the wall and plug in the blender’s electrical cord
- Make sure the lid of the ninja blender is secured and fixed
- You can also lower the speed.
Remember:
- Don’t abuse the electric cord by pulling it to move the blender
- Never damage the power cord, it may lead to serious safety hazards
How to use a ninja blender? Getting things out
After being done with the blending, it’s time to get the product out from the pitcher or cup (if you are using a personal blender).
After using any ninja bullet blender, remove the blade assembly from the cup. You can then drink directly from the blending cup using a spout lid or pour the ingredients into another bowl or glass.
Ninja blenders with locking lids have a spout to pour thin mixtures out of the pitcher. If the blended product is thick, you can remove the whole lid to get it out.
There is a release button on top. Push the release button to unlock the top handhold. The handhold will help you pull the lid.
After the container is open, remove the blade assembly carefully to avoid any injury. You can also use a spatula to remove thick ingredients such as hummus or dough from the jar.
How to use a ninja blender? cleaning, maintenance, storing
Maintaining your blender will make them last longer. Here are general tips to follow to keep your blender fit.
- Have a quick clean of your blender after every use.
- Deep clean your blender from top to bottom after a few uses or weekly according to your usage. (Check here for more details on cleaning Ninja)
- If a component is damaged, replace it with a genuine quality part from authorized dealers only.
- Never try to remove the cover from the base or expose it to water
- Avoid plastic components at the high temperature of the dishwasher
Using Ninja blender: Conclusion
Unlike regular countertop blenders, Using the Ninja blender has a learning curve in its assembling technique.
The ninja blender has a stacked blade assembly. A long shaft with three levels of very sharp blades in the blender jar. If used without proper care, these blades can pose critical damage.
All the above information is generalized to all Ninja blenders. For the specific model you have, you need to follow the instructions in the manual. Happy Blending!