Blender Accessories
Simple, practical guidance for blender accessories.
If you’re working on blender accessories, you’re in the right place. This hub helps you understand the basics, pick the right next step, and avoid the common mistakes that waste time.
Use the cards below to jump to the most useful guides.
What you’ll get here
- Clear next steps for blender accessories
- Beginner-friendly explanations that avoid jargon
- Common mistakes to avoid and what to do instead
- A simple plan you can follow in order
How to start (simple plan)
Start with one clear goal for blender accessories. Then follow a simple sequence: (1) decide what you need, (2) choose the safest/easiest option that fits, (3) test it on a small scale, and (4) improve from there.
⚡ Quick Picks
Three strong options to start with. Pick one that matches your goal, then jump to the guides below.

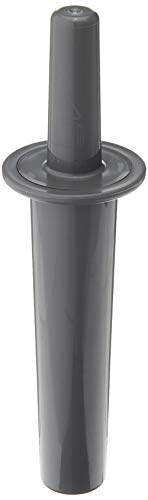
Blender Replacement Part Tamper Tool Compatible with Vitamix Classic Standard 64oz Containers
RELIABLE QUALITY: Overall length 320mm/12.59"inch, made of BPA-free plastic, dis…
COMPATIBLE WITH: Fits standard 64oz containers, the classic tamper NOT WORK with the 48oz or 32oz containers and the low profile 64oz containers found…
Vitamix Mini-Tamper, 9.75 inches, Grey
Compatibility: 32-ounce and 48-ounce Containers ONLY
Dimensions: 9.75 in

Silicone Blender Spatula, Slim Blade Scraper Accessory Designed for Blender Blades1
Versatile Everyday Tool – Whether you have a blender or food processor, this nar…
HIGH QUALITY – DIMENSIONS:13.1 x 1.4 x 1 inches; The soft-touch silicone will not scratch pans, making it a gentle and safe choice for nonstick and ca…
We test and compare dozens of models to recommend only the best performers for your kitchen.
Choose Your Next Step
Blender Lids And Gaskets
Blades And Blade Assemblies
Blender Cups And Pitchers
Latest Guides

Best Vitamix Blender Top Replacements: 9 BPA-Free Options
Discover the best Vitamix blender top replacements to enhance your blending experience. These options are designed for durability and safety, ensuring you get the…

Best Cup For Immersion Blenders: 9 Top Picks
Finding the right cup for your immersion blender can enhance your blending experience. Our selection highlights the best options available, ensuring you choose a…
How We Choose & Recommend
Short, practical guidance first—then product picks when you are ready.
- We compare features and real-world use cases for Blender Accessories.
- We scan user feedback for patterns (not one-off opinions).
- We call out trade-offs so you can pick confidently.
FAQ
What’s the best first step for blender accessories if I’m new to it?
Begin with a simple setup that matches how you’ll actually use it. Do one short test run, verify the result, and only then add extra features or steps. This approach prevents early mistakes and makes it easier to see what’s working.
What mistake causes the most trouble with blender accessories?
Skipping the small checks that prevent big problems—like fit, alignment, safety steps, or basic settings. A 60‑second check before you start is usually faster than fixing an avoidable issue halfway through. For best results, focus on the one or two factors that change the outcome most (environment, settings, fit, or technique). Small adjustments here beat big changes elsewhere.
How do I choose the right option for blender accessories?
Choose based on your use case and constraints: where you’ll use it, how often, how much control you need, and any limits like space or noise. If two options seem close, pick the one with the clearest, simplest workflow. To get reliable results, use a simple checklist: required steps, safety checks, and what to do if the result looks wrong. That keeps you moving without guessing.
How can I improve results with blender accessories without making it complicated?
Lock in the fundamentals first, then refine one small detail that clearly affects the outcome (settings, technique, positioning, or timing). Small improvements compound quickly when the base process is stable. A good habit is to finish with a quick reset/cleanup so the next session starts smoothly. That prevents repeat issues and keeps performance consistent over time.
When should I stop and get help with blender accessories?
Stop if there’s any safety risk, if the same failure repeats after basic checks, or if you’re unsure about the correct procedure. It’s better to verify the right method than to push forward and create a bigger problem. A good habit is to finish with a quick reset/cleanup so the next session starts smoothly. That prevents repeat issues and keeps performance consistent over time.
⭐ Our Top 3 Home & Commercial Blenders Picks for 2026
Blender Replacement Part Tamper Tool Compatible with Vitamix Classic Standard 64oz Containers
RELIABLE QUALITY: Overall length 320mm/12.59"inch, made of BPA-free plastic, dis…
COMPATIBLE WITH: Fits standard 64oz containers, the classic tamper NOT WORK with the 48oz or 32oz containers and the low profile 64oz containers found…
Vitamix Mini-Tamper, 9.75 inches, Grey
Compatibility: 32-ounce and 48-ounce Containers ONLY
Dimensions: 9.75 in
Silicone Blender Spatula, Slim Blade Scraper Accessory Designed for Blender Blades1
Versatile Everyday Tool – Whether you have a blender or food processor, this nar…
HIGH QUALITY – DIMENSIONS:13.1 x 1.4 x 1 inches; The soft-touch silicone will not scratch pans, making it a gentle and safe choice for nonstick and ca…
We test and compare dozens of models to recommend only the best performers for your kitchen.